
When beginner developers start creating solutions for NinjaTrader 8, they often encounter challenges with debugging complex errors during development. In this post, we’ll demonstrate how to utilize OpenAI’s GPT model to build a tool that analyzes error logs and offers actionable suggestions. This example highlights how AI can simplify development tasks and boost productivity for those new to NinjaTrader.
What Are We Going to Do?
This guide focuses on integrating OpenAI's GPT API with NinjaTrader 8 to analyze error logs and offer tailored recommendations. Key steps include:
- Real-time Log Monitoring: Fetch and filter logs from NinjaTrader.
- Error Analysis with OpenAI: Send log messages to GPT for interpretation and suggestions.
- Creating a User Interface: Design a simple UI to display logs and AI-generated recommendations.
Prerequisites
Before starting, make sure you have:
- NinjaTrader 8.1.4.1: Installed and configured.
- Visual Studio Community 2022: Installed and configured.
- Required Libraries: Ensure the following libraries are included in your project:
- OpenAI.dll
- netstandard.dll
- System.ClientModel.dll
- System.MemoryData.dll
- OpenAI API Key: To use the OpenAI API, you need to create an account on OpenAI and generate an API key.
- Basic C# Knowledge: Familiarity with NinjaScript and add-on development.
Step 1: Download Required Libraries
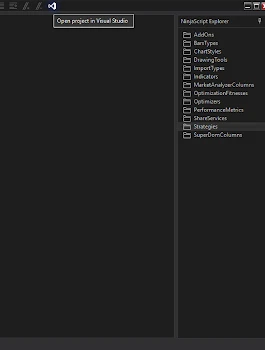
- Open Visual Studio: In the NinjaScript Editor within NinjaTrader, click the "Visual Studio" button in the toolbar. This will automatically launch Visual Studio with your NinjaTrader 8 solution loaded.
- Access NuGet Package Manager:
- Right-click on your project in the Solution Explorer.
- Select "Manage NuGet Packages."
- Install Required Libraries:
- Search for and install the following packages:
OpenAI.dll:Provides access to OpenAI's API functionality.netstandard.dll:Ensures compatibility with .NET Standard libraries.System.ClientModel.dlland System.MemoryData.dll: Support
- Search for and install the following packages:
- Copy Libraries to NinjaTrader Directory:
- Navigate to the dependencies section in the NuGet Package Manager. Right-click the desired library and select "Open Containing Folder." From this folder, copy the
.dllfiles to the NinjaTrader custom directory at\Documents\NinjaTrader 8\bin\Custom\.
- Navigate to the dependencies section in the NuGet Package Manager. Right-click the desired library and select "Open Containing Folder." From this folder, copy the
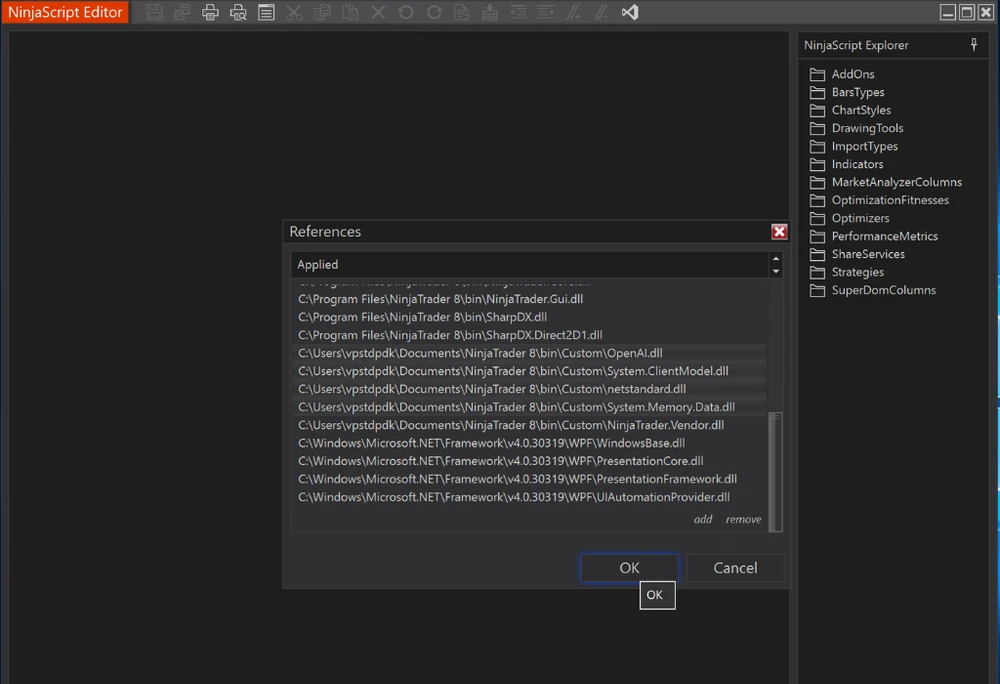
- Add References in NinjaScript Editor:
- Open NinjaTrader's NinjaScript Editor.
- Right-click on "References" in the solution explorer and choose "Add."
- Browse to the
\bin\Custom\folder and add references to the copied.dllfiles. - Once done, compile NinjaTrader by pressing F5 in the NinjaScript Editor to ensure all dependencies are correctly linked.
By following these steps, you ensure that all required libraries are integrated seamlessly into your NinjaTrader environment.
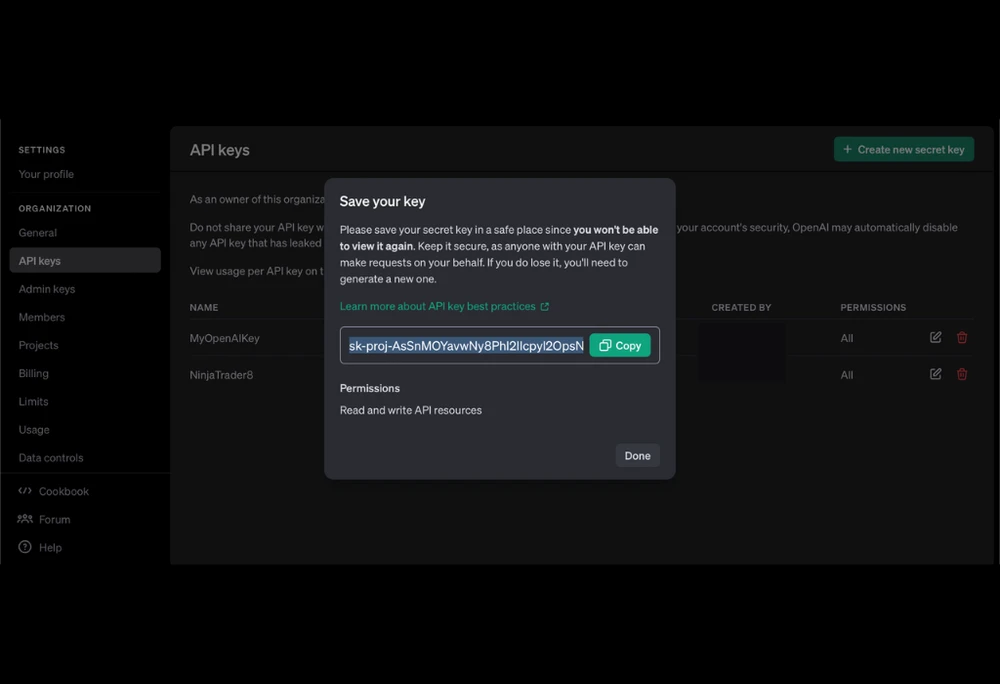
Step 2: Register an OpenAI Account
1. Go to the OpenAI website, sign up for an account.
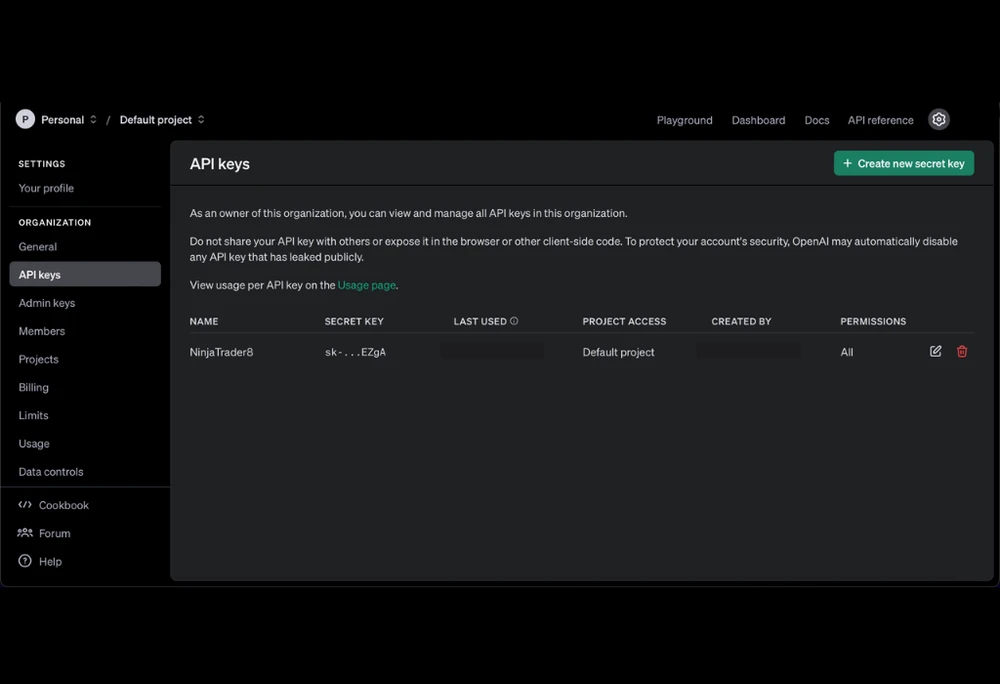
2. Generate an API key.
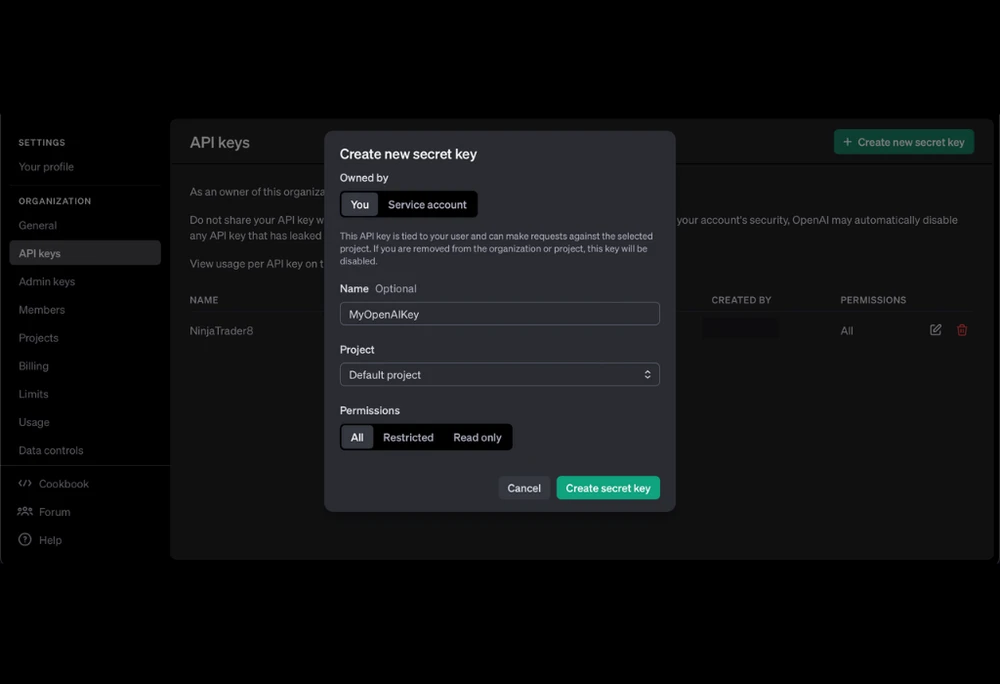
3. This key will be used to authenticate requests to the OpenAI API. For simplicity in this experiment, we will hardcode the API key directly in the code. However, once the solution is functional, ensure to securely store the key in a reliable and secure location.
Step 3: Set Up the Add-On Framework
To create the add-on, start by defining a class that integrates with NinjaTrader's Control Center. This class will include a menu item for launching the assistant and manage the lifecycle of the add-on's functionality. Use the following code snippet to define the main structure of the add-on:
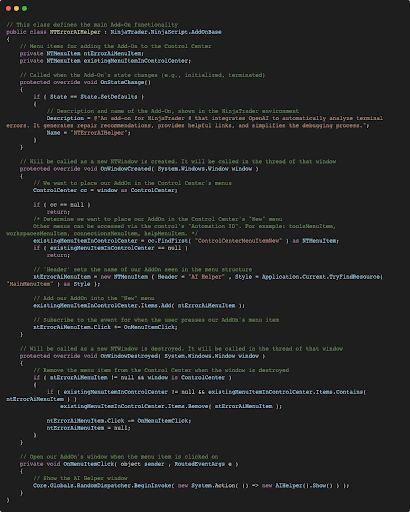
Each method in the provided code plays a specific role in enabling the functionality of the add-on:
- OnStateChange: This method initializes the add-on and sets its default properties, such as its name and description, ensuring it's correctly displayed in the NinjaTrader environment.
- OnWindowCreated: This method adds the "AI Helper" menu item to the "New" menu in the NinjaTrader Control Center. It checks if the Control Center window exists, identifies the appropriate menu, and dynamically inserts the new menu item.
- OnWindowDestroyed: This method ensures that when the Control Center window is closed, the add-on cleans up by removing the "AI Helper" menu item and unsubscribing from any associated events to avoid memory leaks.
- OnMenuItemClick: This method defines the action that occurs when the "AI Helper" menu item is clicked. It launches the main window for the add-on (AI Helper window) using NinjaTrader's dispatcher to manage threading.
This setup provides a robust structure for integrating the add-on into NinjaTrader, enabling easy access and functionality through the Control Center's menu.
Step 4: Build the User Interface
Develop a user-friendly interface using WPF elements, as shown in the following code snippet and its explanation:
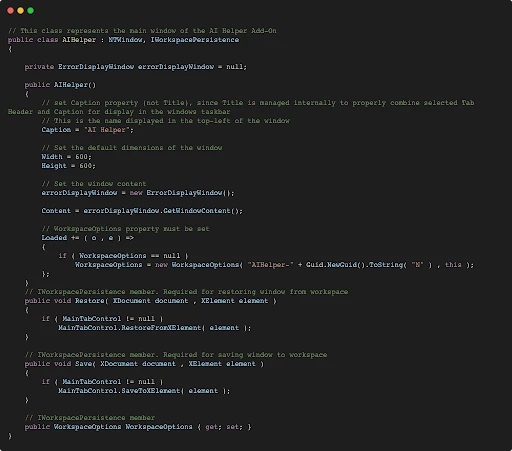
The AIHelper class creates a custom window in NinjaTrader, designed to be both functional and persistent, meaning its state is saved when closed and restored upon reopening. It inherits from NTWindow, making it a standard NinjaTrader window, and implements the IWorkspacePersistence interface, which handles saving and restoring the window’s state.
Key Features:
Window Title and Dimensions: The window’s title is set to "AI Helper", displayed in the top-left corner. Its default size is set to 600x600 pixels, providing a compact and consistent layout.
Content Setup: Inside the window, an instance of ErrorDisplayWindow is used to display content, likely related to error messages or logs. The content is added via the GetWindowContent() method of ErrorDisplayWindow.
Workspace Integration: When the window loads, it checks if it has associated workspace settings (WorkspaceOptions). If not, it creates a new workspace configuration with a unique identifier (GUID). This ensures that each instance of the window can be managed independently by NinjaTrader's workspace system.
State Persistence: Two methods, Restore and Save, are implemented from the IWorkspacePersistence interface:
Restore: Restores the state of the window (like tabs or layout) using data saved in an XML structure.
Save: Saves the current state of the window to XML, so it can be restored later.
Seamless User Experience: With these features, users can close the window, reopen it later, and continue working without needing to reconfigure anything manually.
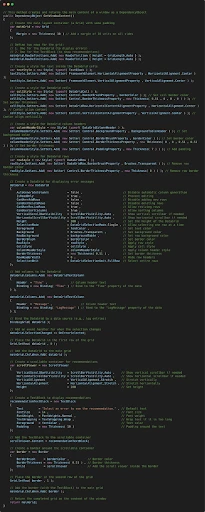
Window Content Creation: Grid Layout Explained
This method defines the main content of a custom NinjaTrader add-on window, using a Grid layout for organization. The layout is carefully structured into two main sections:
- A DataGrid to display error logs dynamically.
- A TextBlock for recommendations, wrapped within a ScrollViewer to ensure proper readability.
The overall design prioritizes clarity, usability, and responsiveness, making the interface user-friendly for traders and developers.
Key Components
Main Layout (Grid)
The Grid serves as the primary container for all UI elements. It organizes the interface into two rows:
- Row 1: Contains the DataGrid for error logs.
- Row 2: Holds a TextBlock, wrapped in a ScrollViewer, for displaying recommendations.
Additional features include:
- Margin: A 10-unit margin around the grid ensures spacing between the layout and the window edges.
DataGrid for Error Logs
The DataGrid is a central component, providing an interactive and readable list of error logs. Key attributes:
- Read-only Mode: Prevents editing to maintain data integrity.
- Custom Styles:
- Rows, Cells, and Headers: Styled to enhance readability and maintain a cohesive visual design.
- Center-aligned Text: Provides a neat and professional appearance.
- Borders: Subtle lines separate rows and columns, improving clarity.
- Dynamic Binding: The
BindLogGridmethod connects the DataGrid to a data source, ensuring it updates in real time as logs are generated. - Columns:
- Time: Displays the timestamp of each error log.
- Message: Shows detailed error descriptions.
- Event Handling:
- The
OnErrorSelectedevent updates the recommendations displayed in the TextBlock when a log entry is selected.
- The
Scrollable Recommendations Section
A ScrollViewer wraps a TextBlock to display AI-generated recommendations for the selected error log. This section adapts dynamically to the content size, providing a seamless user experience.
- TextBlock Styling:
- Default placeholder: "Select an error to see the recommendation."
- Font Size: Set to 14 for readability.
- Text Wrapping: Ensures the content fits within the window without horizontal scrolling.
- Padding: Adds spacing around the text for a clean appearance.
- ScrollViewer Functionality:
- Enables scrolling for long recommendations.
- Borders: Encased in a subtle border for visual distinction.
Grid Placement
- The DataGrid is added to the first row of the grid.
- The ScrollViewer, containing the TextBlock, is placed in the second row, providing a clear separation between error logs and recommendations.
Return Value
The method returns the fully constructed Grid, ready to be assigned as the content of the add-on window.
Why This Design Works
- Clarity: Errors and recommendations are visually separated for easier navigation.
- Readability: Thoughtful styling ensures that both logs and recommendations are easy to interpret.
- Interactivity: Users can select errors to dynamically update recommendations.
- Responsiveness: Scrollbars and adaptive layout handle varying content gracefully.
Step 6: Bind Logs to the UI
The BindLogGrid method connects a DataGrid in the user interface to a proxy collection (proxyLogEntries) that synchronizes with the original log entries in NinjaTrader’s internal log system. Supporting methods, such as SyncCollections and HandleCollectionChange, handle synchronization and ensure data is displayed accurately while maintaining thread safety.
1. Key Components
proxyLogEntries:
A collection (ObservableCollection<LogGridEntry>) that acts as an intermediary between the internal log data and the UI-bound DataGrid.

- Original Log Entries:
The internal collection of log entries in NinjaTrader is accessed via reflection. This collection is not directly UI-bound but is synchronized withproxyLogEntries. - UI Thread Safety:
NinjaTrader’s UI operates on a single thread. TheDispatcherensures all updates to theDataGridhappen on the correct thread.
2. Method: BindLogGrid
Connects the proxyLogEntries collection to a DataGrid and synchronizes it with the original log entries.
How It Works:
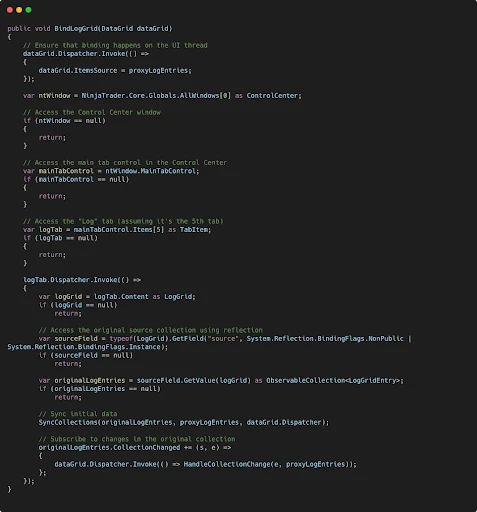
- Binding the Proxy Collection:
- The
DataGrid.ItemsSourceis set toproxyLogEntriesusing theDispatcher.Invokemethod to ensure the operation runs on the UI thread.
- The
- Accessing the Original Collection:
- The method locates NinjaTrader’s internal Log tab using the Control Center’s
MainTabControl.
- The method locates NinjaTrader’s internal Log tab using the Control Center’s
- Reflection for Log Data:
- It retrieves the internal
LogGridsource collection via reflection, ensuring access to the underlying data.
- It retrieves the internal
- Synchronization:
- It calls
SyncCollectionsto populateproxyLogEntrieswith relevant data and subscribes to changes in the original log entries viaCollectionChanged.
- It calls
3. Method: SyncCollections
Synchronizes the original log entries with proxyLogEntries, ensuring only relevant entries are displayed in the UI.
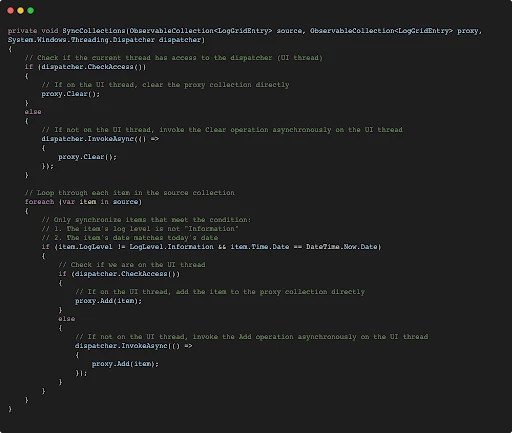
How It Works:
- Thread Safety:
- Ensures operations on
proxyLogEntriesoccur on the UI thread, usingDispatcher.CheckAccessandInvokeAsync.
- Ensures operations on
- Filtering Items:
- Adds only non-Information level logs from today’s date to
proxyLogEntries.
- Adds only non-Information level logs from today’s date to
- Synchronization:
- Loops through the source collection, filtering and adding items to the proxy collection.
4. Method: HandleCollectionChange
Responds to changes in the original log collection and updates the proxy collection accordingly.
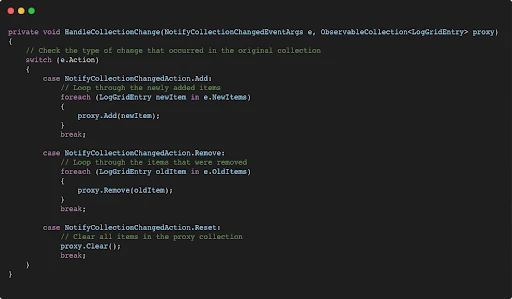
How It Works:
- Detects Collection Changes:
- Monitors the original collection for additions, removals, or resets.
- Updates the Proxy Collection:
- Ensures
proxyLogEntriesstays synchronized with the original collection.
- Ensures
Why This Approach Works:
- Thread-Safe Operations:
Guarantees all UI updates are executed on the correct thread. - Filtered Data Display:
Displays only relevant log entries, improving clarity. - Real-Time Updates:
The proxy collection stays synchronized with the internal logs, ensuring the UI reflects the latest changes.
Step 7: Create OpenAI Client Class
In this step, we create a dedicated class to interact with OpenAI's GPT API. This class encapsulates the logic for sending messages to the API and retrieving responses, making it reusable and modular for other components of the add-on.
Overview of the Class
- The
OpenAIAsistentclass acts as a wrapper around OpenAI's chat API functionality. - It manages the communication with the API, allowing you to send messages and receive responses.
Declaring a ChatClient Object
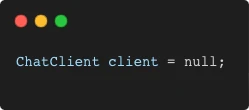
The ChatClient object (client) is declared to handle communication with the OpenAI API.
This object will be initialized in the class constructor.
Constructor to Initialize the ChatClient
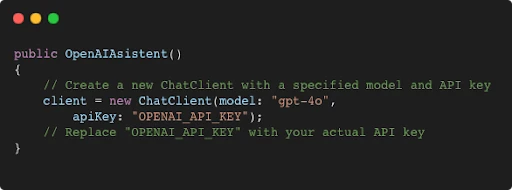
ChatClient Initialization:
The ChatClient is initialized with two parameters:
model: "gpt-4o":Specifies the AI model to use (e.g., GPT-4 optimized version).apiKey: "OPENAI_API_KEY":Authenticates the client with OpenAI's servers.
Replace "OPENAI_API_KEY" with your actual API key to enable API requests.
This setup ensures the OpenAIAsistent class is ready to send and receive messages from the API.
Method to Send a Message and Get a Response
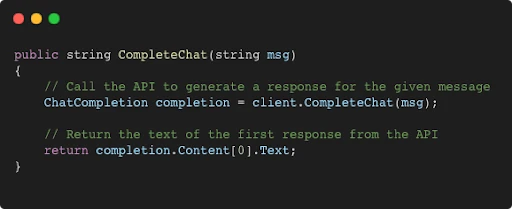
Input Message:
- The
CompleteChatmethod takes a string parameter msg, which represents the message you want to send to the API.
Calling the API:
client.CompleteChat(msg)sends the message to OpenAI's chat API and retrieves the response as aChatCompletionobject.
Extracting the Response:
- The response may contain multiple completions. The method returns the Text of the first completion using
completion.Content[0].Text.
This method encapsulates the API call, simplifying the process of sending a message and retrieving a response.
Step 8: Launch and Test the Add-On
Once you’ve compiled the add-on in NinjaTrader, it’s time to test its functionality directly within the platform. Follow these steps:
- Launch the Add-On:
- Open NinjaTrader's Control Center.
- Navigate to the New menu and select AI Helper from the list. This action will open the add-on window.
- Explore the Add-On Window:
- Observe the layout of the window:
- The top section contains a DataGrid that displays the error logs fetched from NinjaTrader.
- The bottom section contains a TextBlock, which will display AI-generated recommendations for the selected log.
- Observe the layout of the window:
- Interact with the Logs:
- Click on any log entry in the DataGrid to select it.
- Once selected, the add-on will send the error message to the OpenAI API.
- Wait for the AI to process the message (this might take a few seconds).
- View Recommendations:
- The recommendation generated by OpenAI will appear in the TextBlock below the DataGrid.
- This process provides actionable insights tailored to the selected error message.
- Test Responsiveness:
Select multiple logs to ensure the recommendations update dynamically.
By following these steps, you can confirm that the add-on operates as expected and delivers its intended value.
Conclusion
By integrating OpenAI’s GPT model into NinjaTrader, we’ve built a practical tool for simplifying error analysis. This project demonstrates how AI can enhance development workflows, making it easier to debug and improve your solutions. Experiment with this approach to unlock more possibilities in your NinjaTrader 8 projects.
Sources and Further Reading
- OpenAI API Documentation
- NinjaTrader 8 Add-On Development Guide
- ErrorAIHelper Indicator Export
- Visual Studio Project Template
Access the Code
You can find the full source code for this project on GitHub.
